
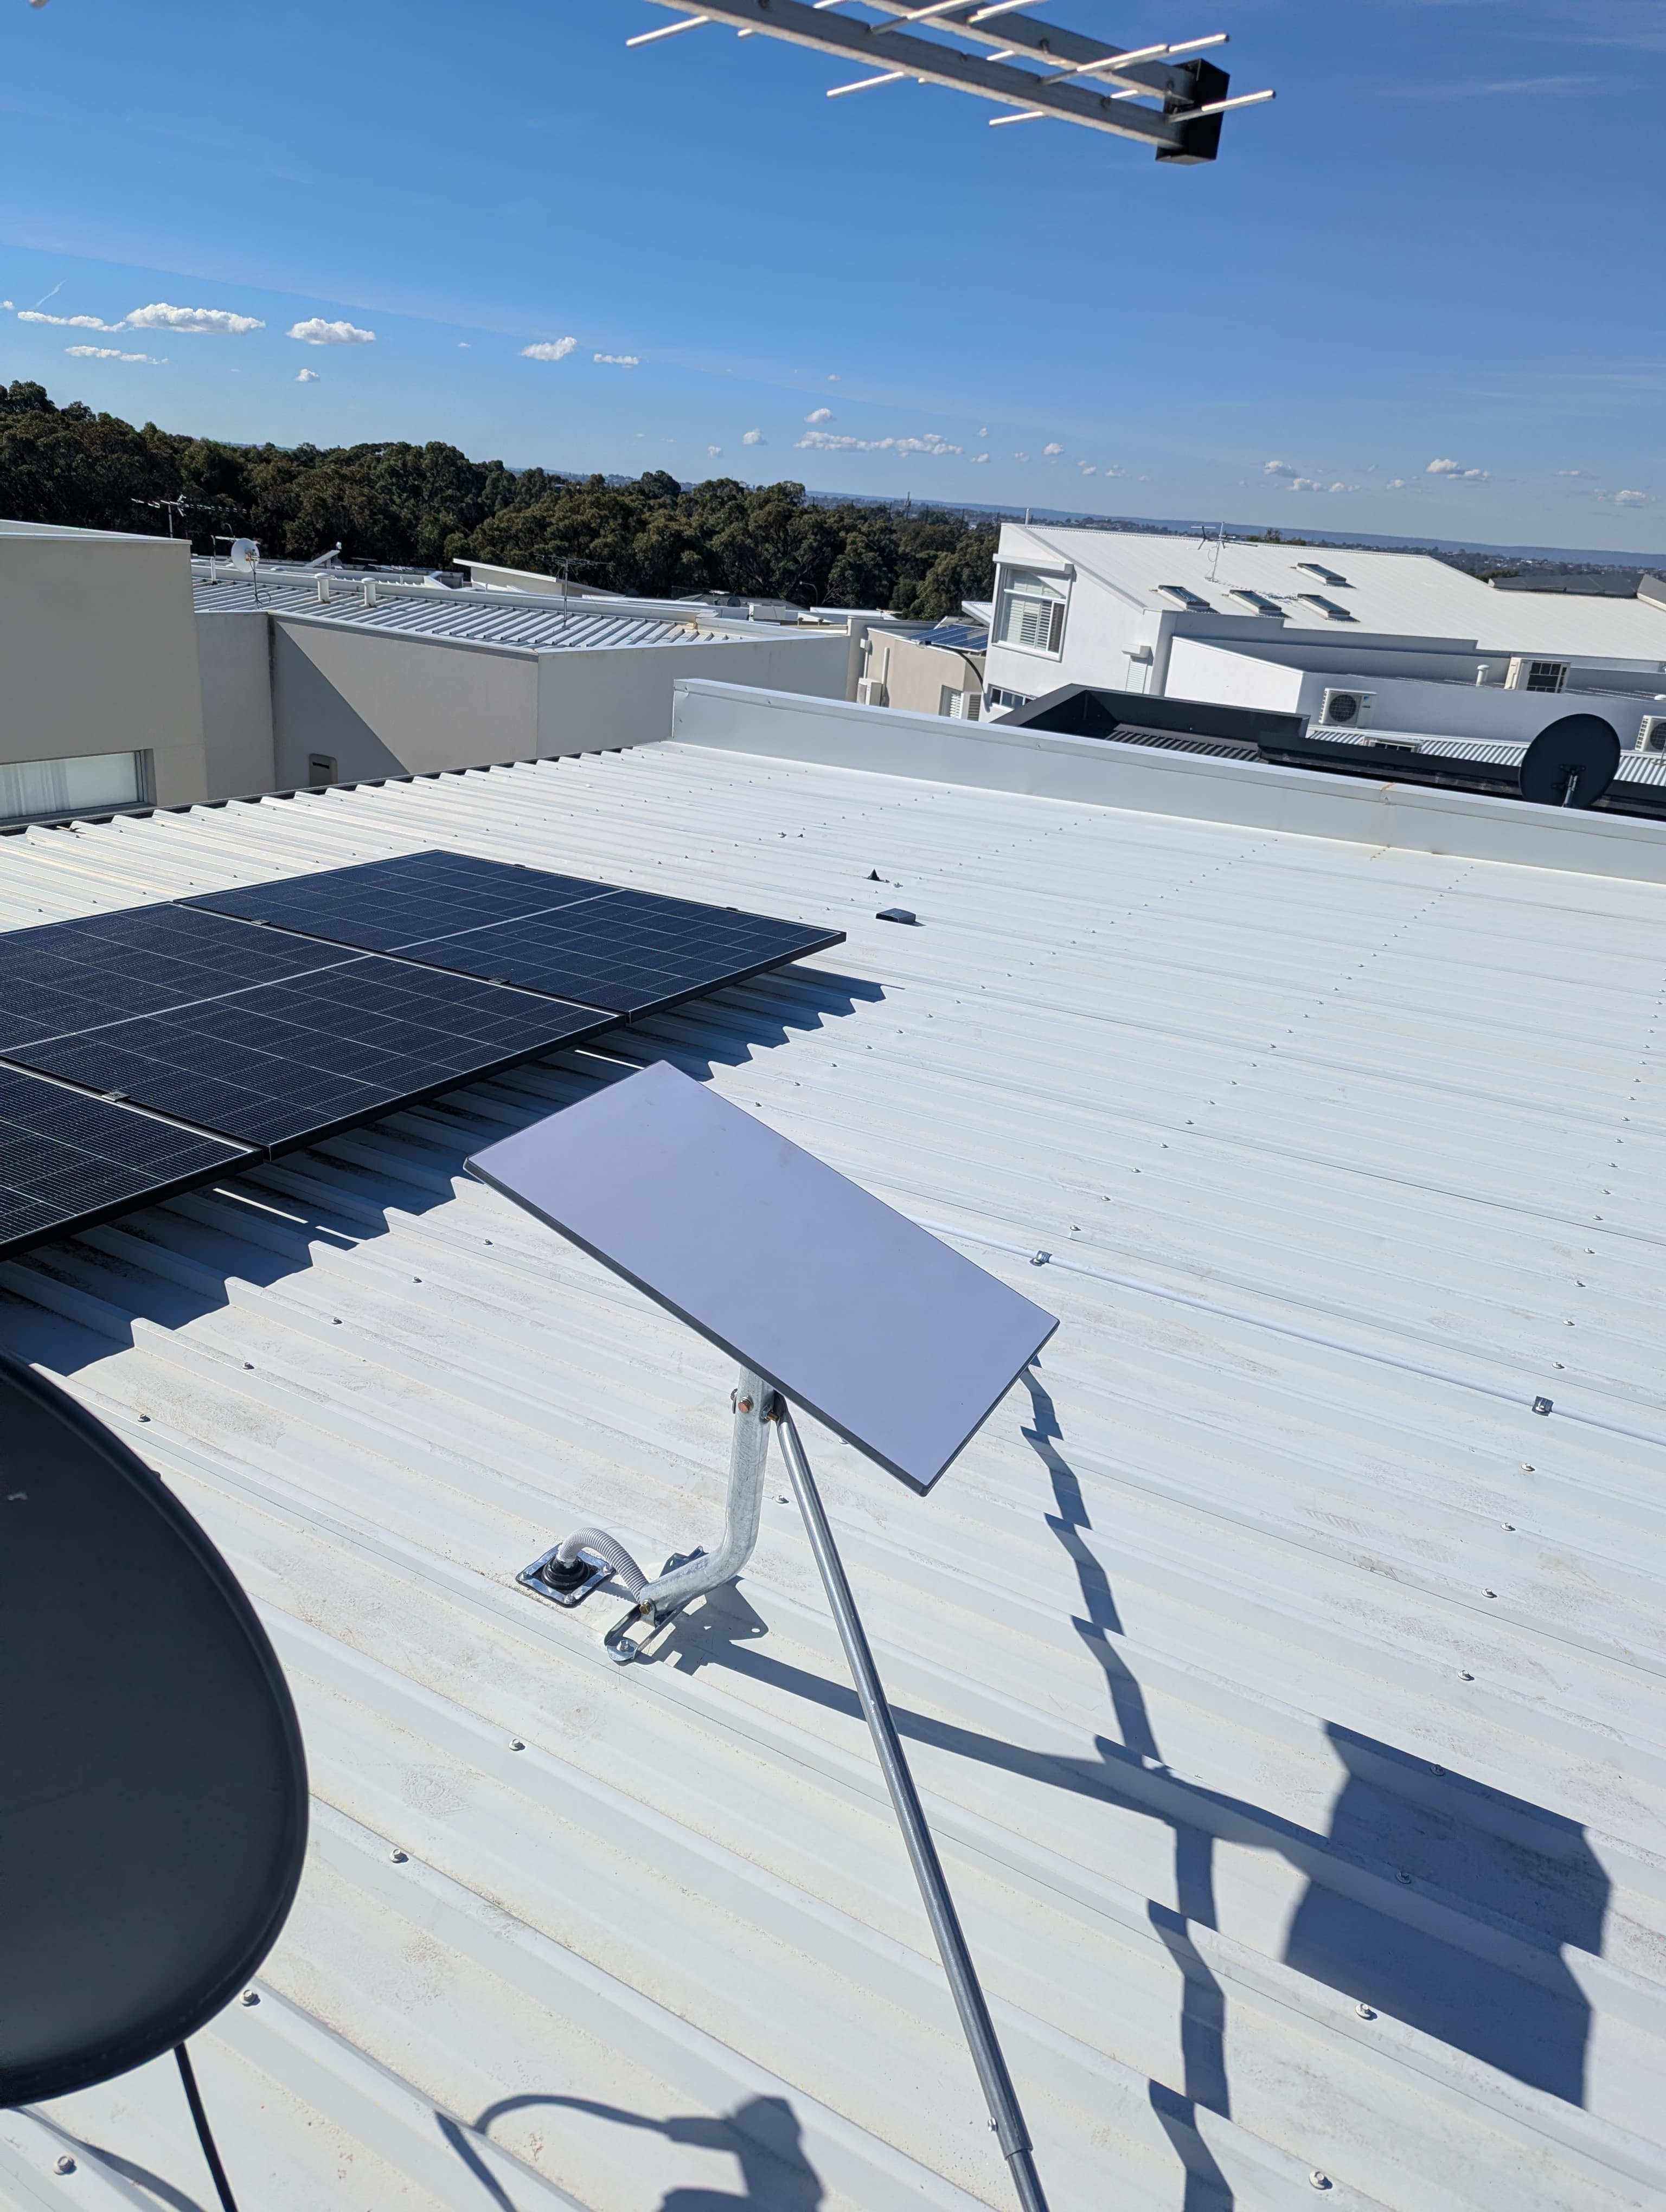
We completed a Starlink Gen 3 installation in City Beach where the internal finish was a major part of the job. The customer wanted the system installed properly, with the router, power supply and cable entry kept neat inside the home.
The City Beach Starlink installation
This was a two-storey home, so it needed more planning than a basic single-storey install.
The goal was to mount the Starlink Gen 3 dish securely on the roof, choose a location with a clear view of the sky, route the cable neatly back inside, and avoid leaving the router and power supply loose on a bench or floor.
With two-storey properties, roof access, cable path and weatherproofing all need to be thought through before the job starts. It is not the kind of install where you want to rush the dish onto the nearest easy spot and hope for the best.
For this job, the dish was mounted in a suitable roof position and the cable was brought inside to a practical router location.
Why the internal finish matters
A neat Starlink installation is not just about what happens on the roof. The internal finish matters too.
If the cable enters the home and the router is left sitting loose on a bench, the job can still feel unfinished. The Starlink Gen 3 router and power supply are not tiny, and once the cable is inside the house, it is easy for the setup to look messy.
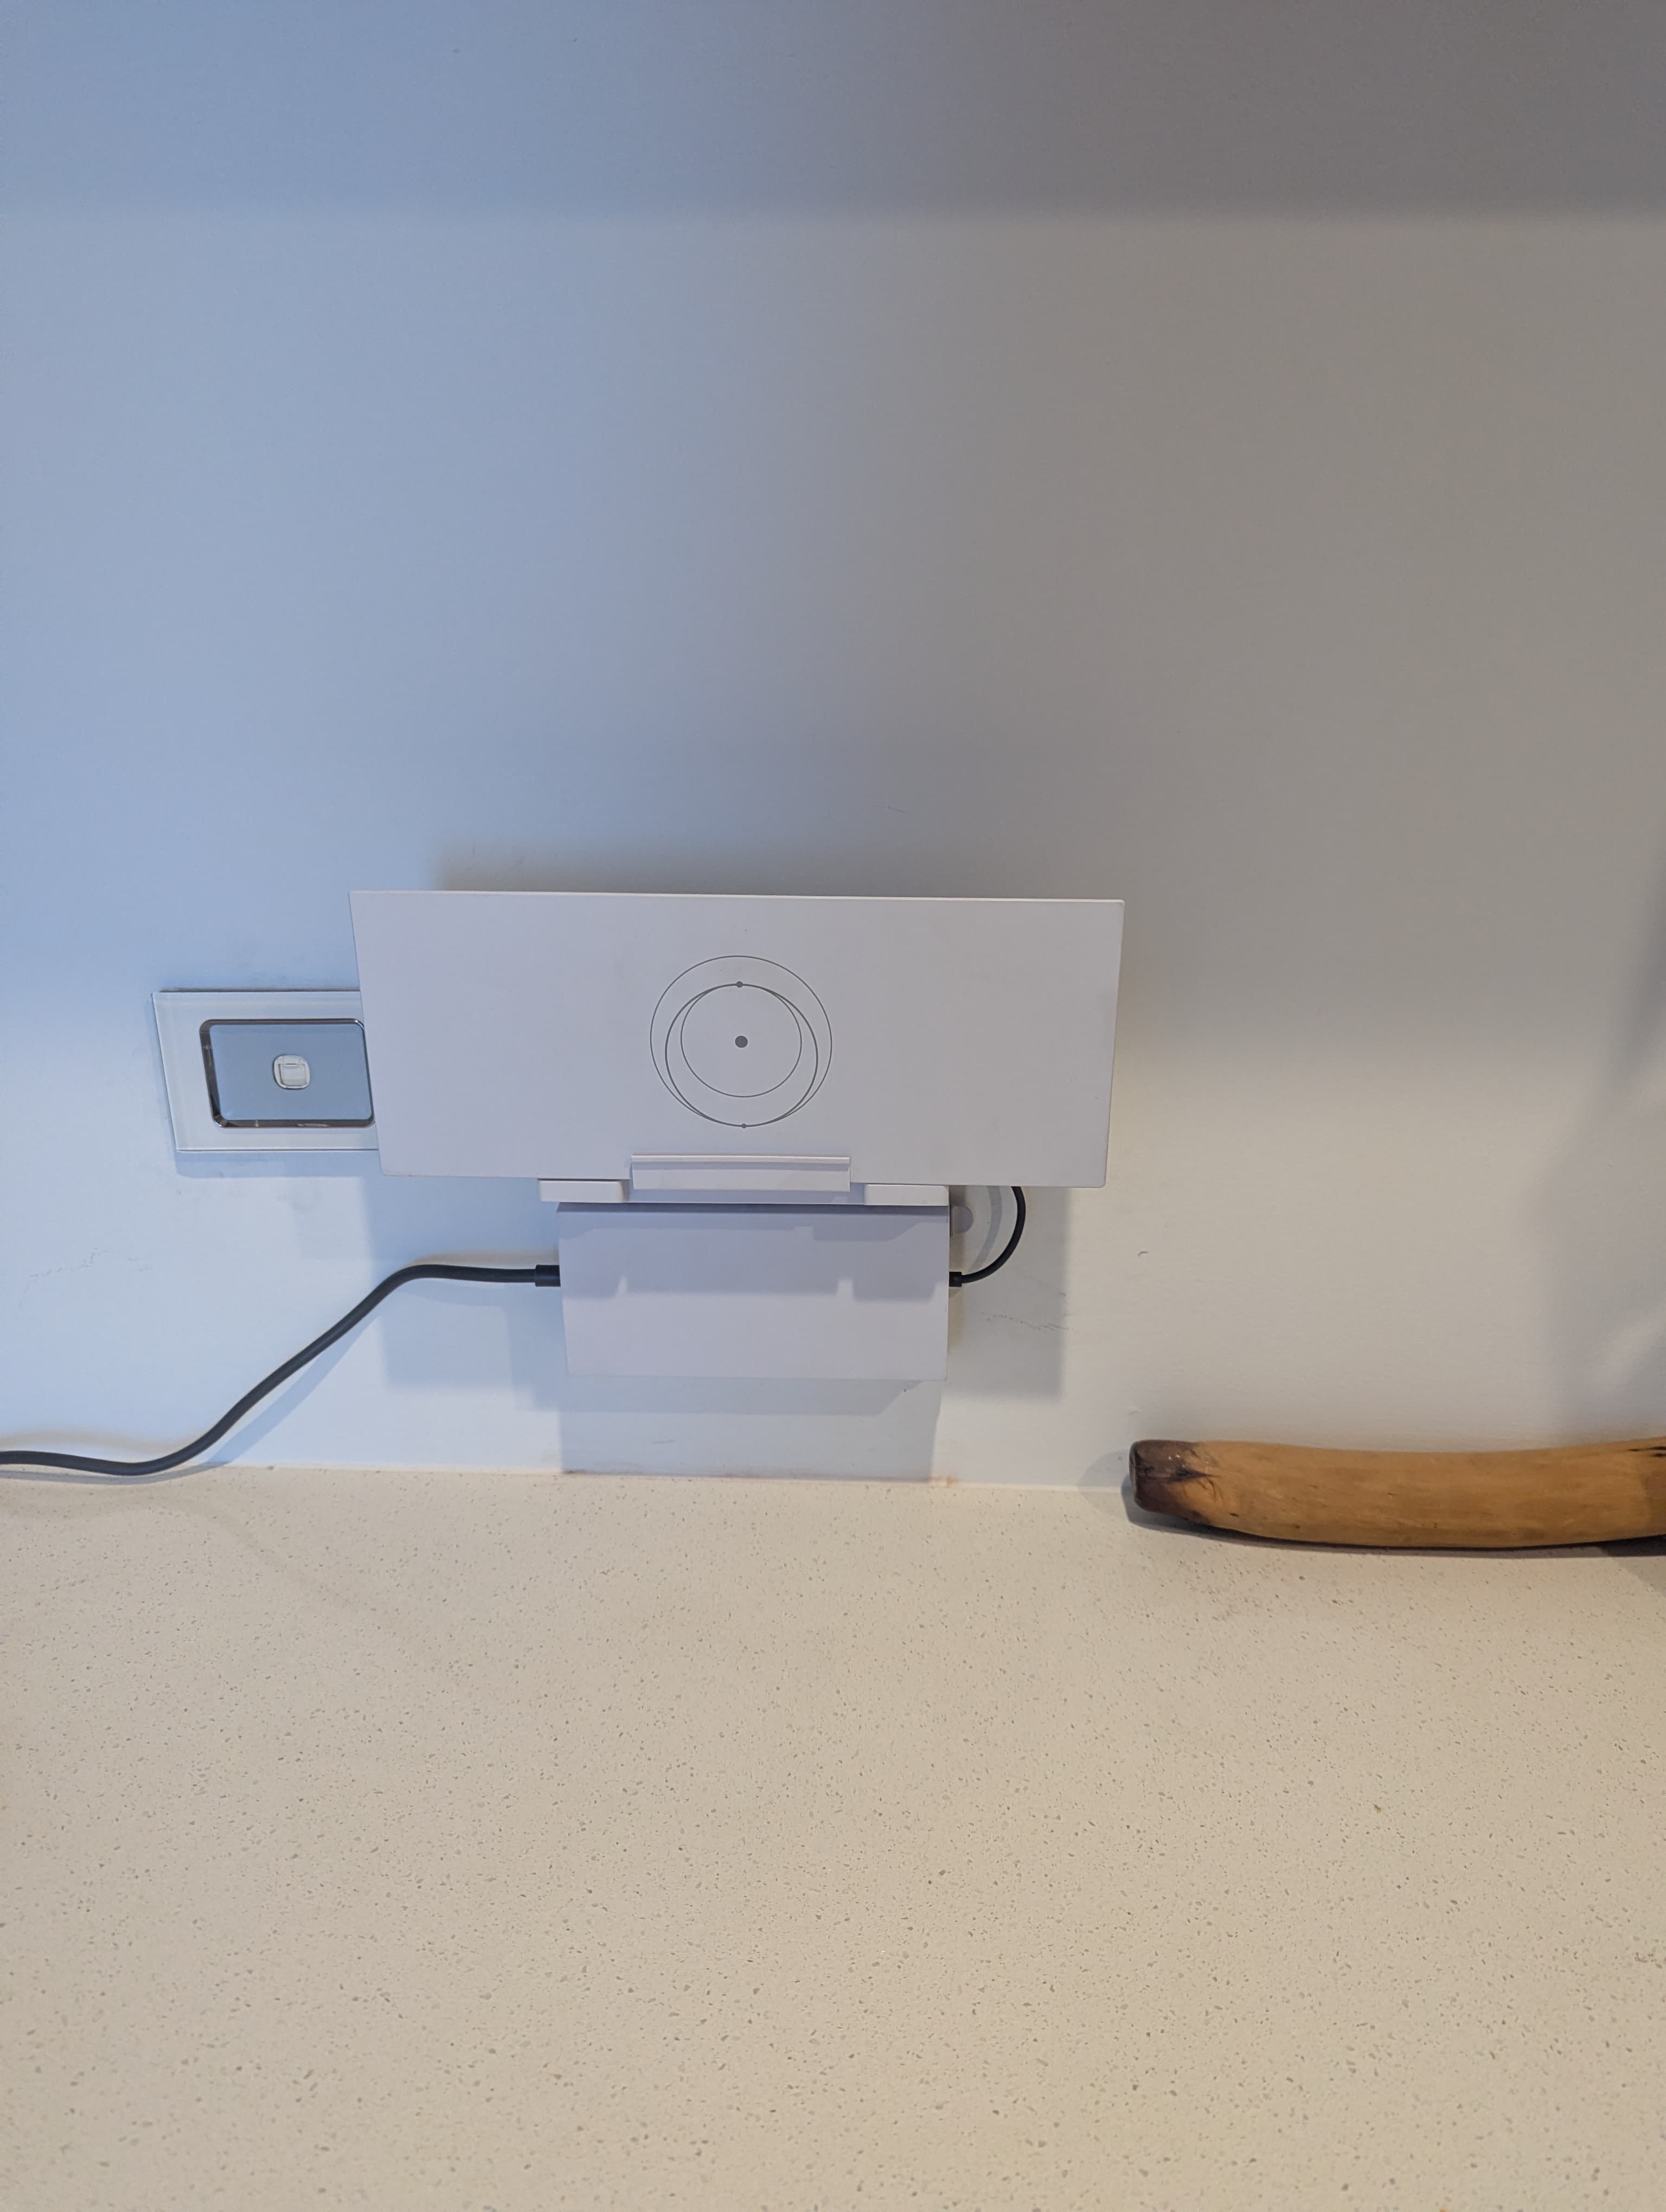
For this City Beach install, we used a Starlink Gen 3 router bracket to keep the router, power supply and excess cable together in one tidy location.
- router left loose on a kitchen bench
- power supply sitting on the floor
- excess cable looped around the room
- visible cable entry point
- no clear place for the equipment to live
The Gen 3 router bracket
The Gen 3 router bracket gives the internal part of the install a much cleaner finish.
The bracket holds both the Starlink router and the power supply. It also allows excess cable to be tucked behind the bracket, which helps avoid the usual loose cable mess.
Where suitable, the bracket can also be installed over the antenna cable entry point. That means the cable can come through the wall behind the bracket, rather than leaving a visible entry point or a loose cable running across the room.
It is a small part of the install, but it makes a noticeable difference.
- kitchens
- studies
- living rooms
- garages
- home offices
- rental properties
- holiday homes
- any area where the router needs to be visible but tidy
Two-storey Starlink installs need more planning
Two-storey Starlink installations are not the same as a simple ground-level or single-storey setup.
There is more to consider, including roof access, ladder position, fall risk, dish location, cable route and weatherproofing. In coastal suburbs like City Beach, the install also needs to be tidy and durable, not just quick.
A rushed install can leave you with a poor dish location, ugly cable run, awkward router position or a cable entry that does not look right inside the home.
On this project, the aim was to keep the install practical, safe and tidy from the roof through to the router.
The final result
The finished result was a clean Starlink Gen 3 installation with the dish mounted securely outside and the router installed neatly inside on a dedicated bracket.
The router, power supply and cable entry were kept together in one location, with no loose router sitting on the bench and no obvious cable mess around the room.
It is a good example of why the small details matter. A Starlink installation should not only work properly. It should also look like it belongs in the home.