
For most standard homes in Perth, professional Starlink installation commonly sits between $499 and $900. The final cost depends on roof access, mounting, cable routing, weatherproofing, Wi-Fi requirements and the complexity of the property.
Why Starlink Installation Costs Vary So Much
Starlink itself is a straightforward product, but every property is different. Installing a satellite dish on a neat single-storey home is a very different job compared to mounting it on a steep double-storey roof, a shed or a property with tricky cable runs and access challenges.
The price is not just about putting a dish on the roof. It includes secure mounting, weatherproof cable entry, smart cable routing, proper dish placement, system setup and making sure your Wi-Fi actually works. Each of those steps can add time, complexity and cost.
What Is a Typical Starlink Installation Cost in Perth?
For most standard homes in Perth, you can expect a Starlink installation to cost between $499 and $900. That range reflects real differences in property type, roof access and installation requirements.
- Lower end: simple single-storey homes with good roof access and a short cable run.
- Higher end: double-storey homes, awkward roofs, long cable runs, tile roofs or jobs requiring extra Wi-Fi work.

Beware of Rock-Bottom Base Prices
Be careful with installers advertising very low base prices. Those prices often do not include the extras you actually need, such as safe mounting, proper cable work, roof sealing or Wi-Fi setup.
The cheapest install is not good value if it leads to leaks, cracked tiles, messy cable runs or poor Starlink performance.
What Actually Changes the Price?
Several practical details can push your Starlink installer Perth cost up or down. Two jobs that both need Starlink installation can be as different as a quick 90-minute visit or a careful custom job that takes a whole afternoon.
- Roof height, including single-storey vs double-storey access
- Roof pitch, from flat and simple through to steep and awkward
- Tile roof vs Colorbond roof
- Starlink mounting position and sky visibility
- Cable entry location and cable run length
- Whether conduit or special cable concealment is needed
- Mount type, such as roof, wall, fascia, pole or custom mast
- Extra Wi-Fi equipment or mesh systems
- Safety requirements, access equipment or an extra installer
What Does a Basic Single-Storey Installation Look Like?
The ideal lower-cost install is a single-storey home with safe ladder access, clear roof space, a short cable path, minimal conduit and an obvious unobstructed dish location.
Even on a simple job, the aim is not just to get Starlink working. The install still needs a neat, watertight finish that holds up over time.
What Makes Double-Storey or Tricky Roofs More Expensive?
Working at height is slower, riskier and often needs a second person or special equipment. Steep roofs, fragile tiles, awkward eaves and confined access all add time and complexity.
A cheap install is not cheap if it leads to cracked tiles, poor cable entry or a badly positioned dish that underperforms or leaks.
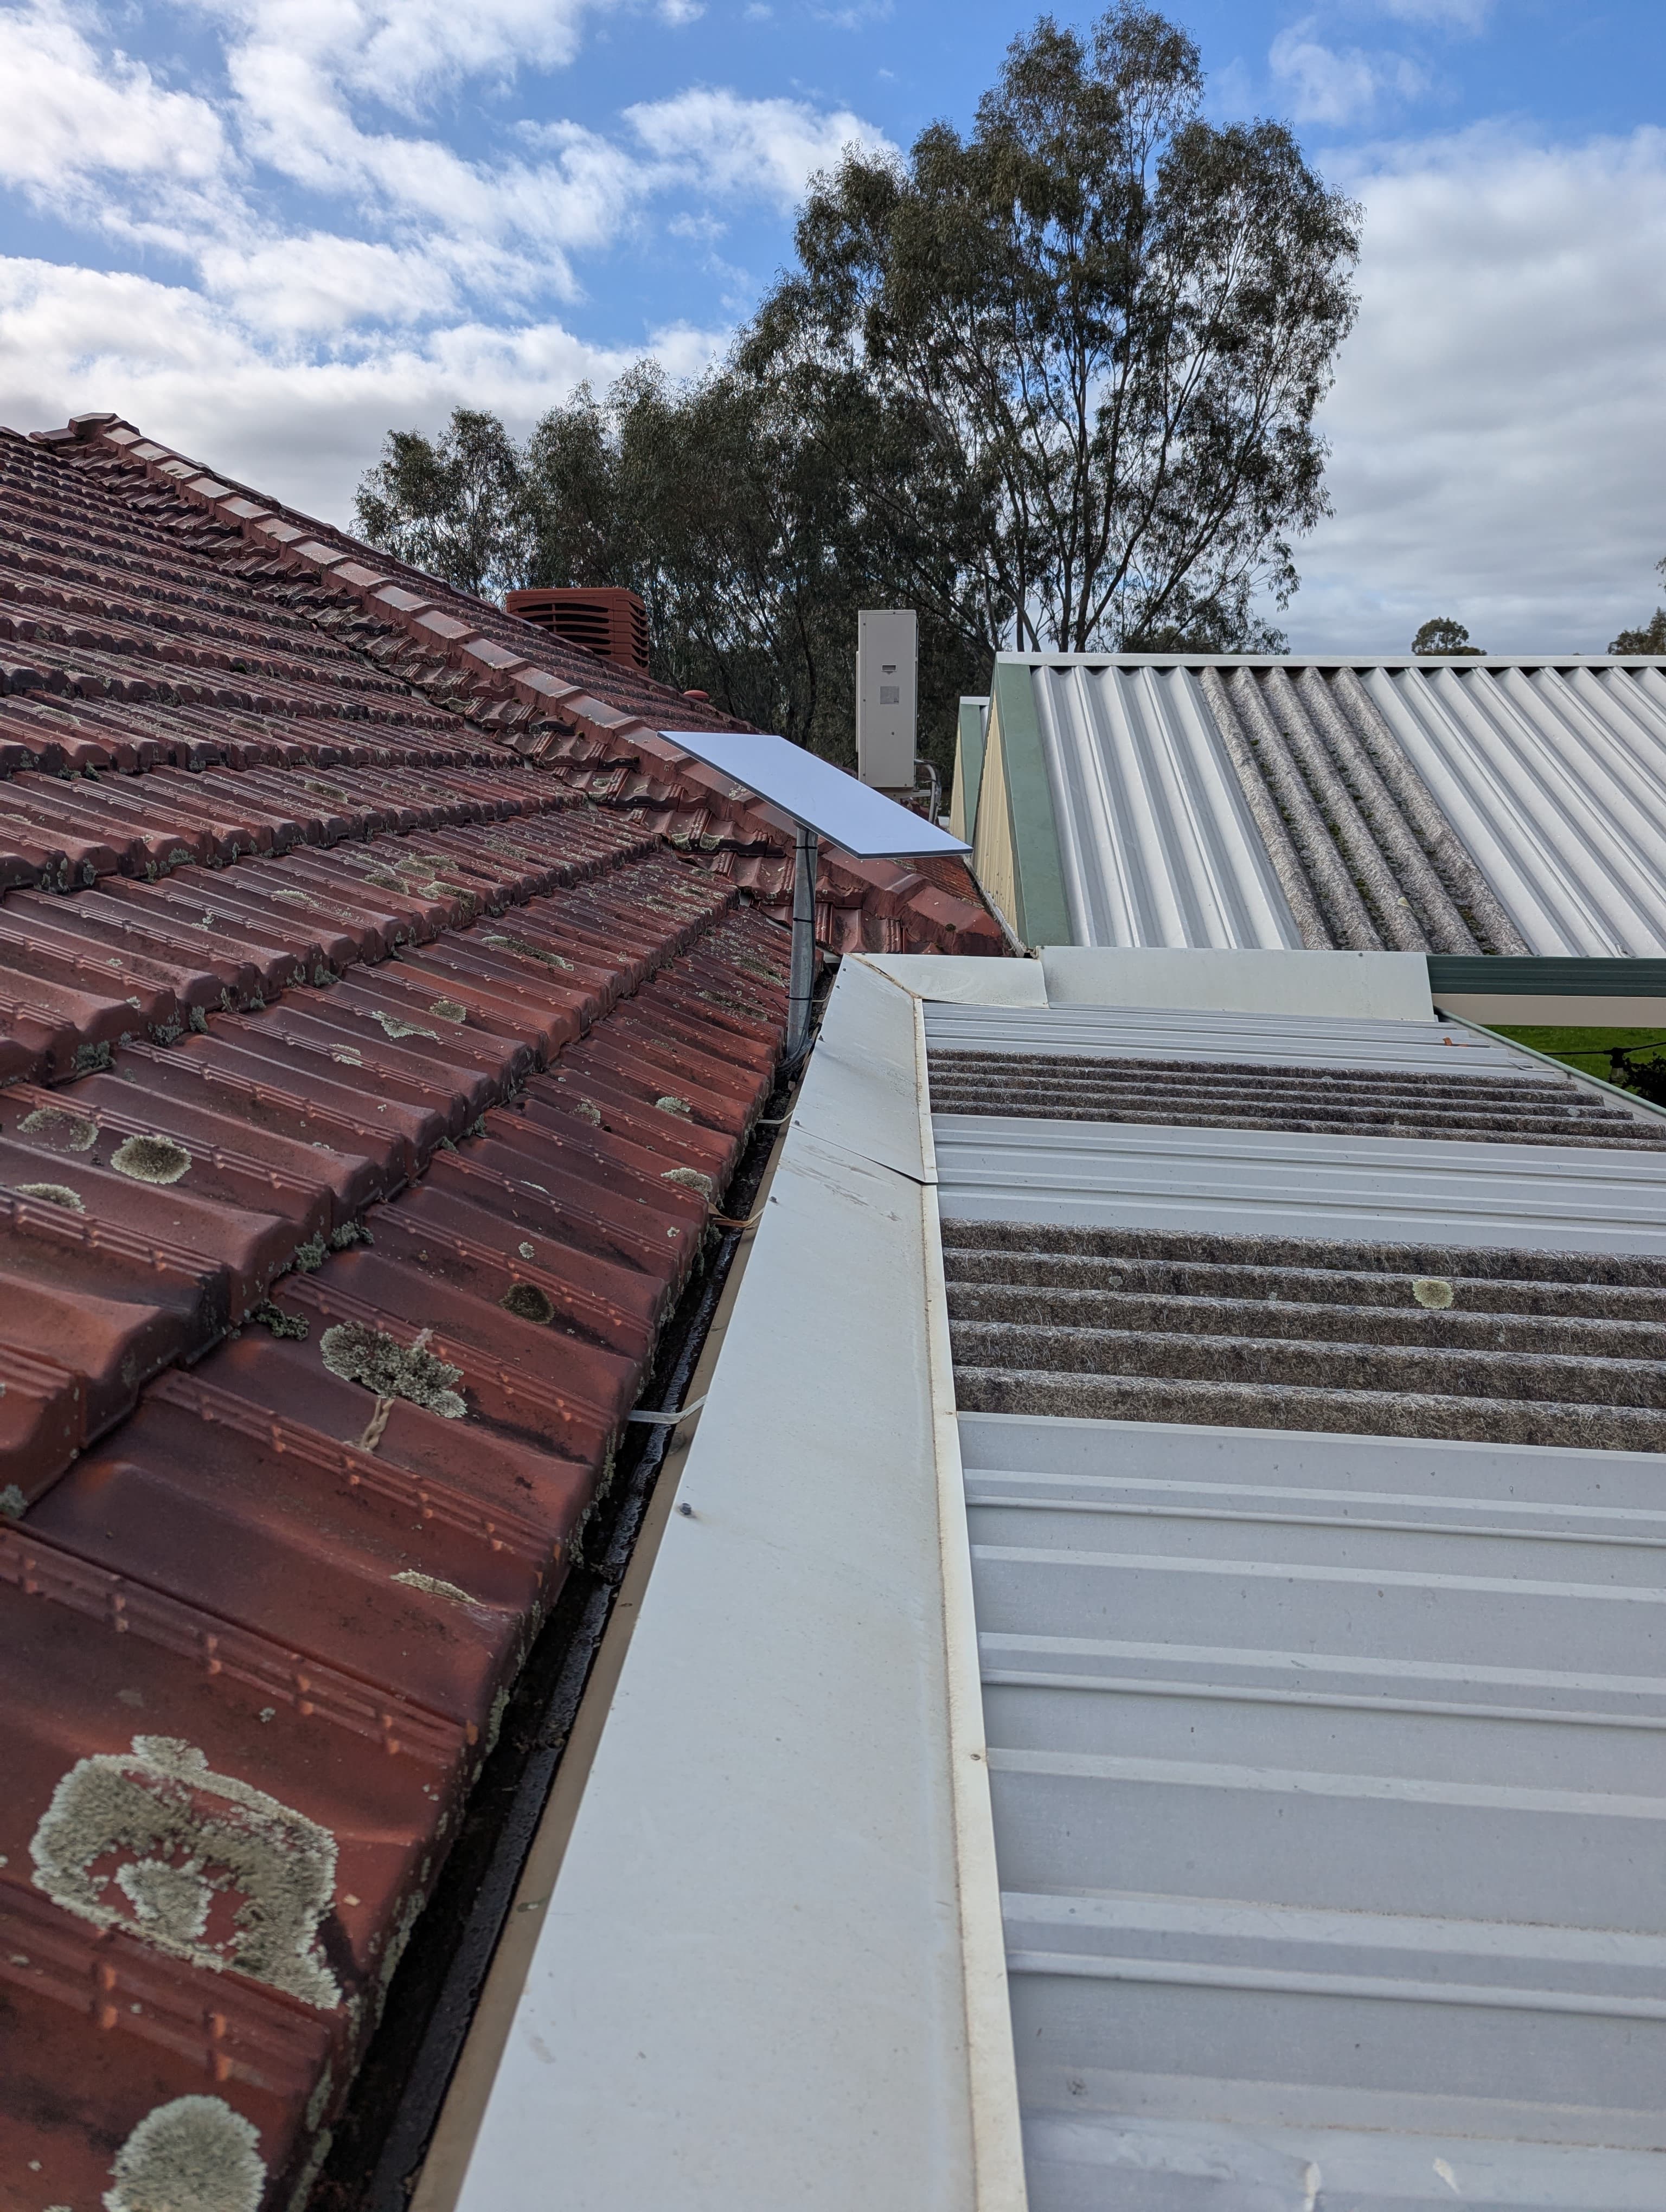
Tile Roof vs Colorbond: What Is the Difference?
In Perth, Colorbond roofs are often simpler for Starlink, but they still need proper sealing and cable management. Tile roofs can take longer because tiles may need to be lifted, cable paths planned carefully and cracked tiles avoided.
Any roof penetration needs professional sealing. At Blake Smart Solutions, we use a Dektite seal on suitable roof penetrations, not a messy blob of silicone and hope.

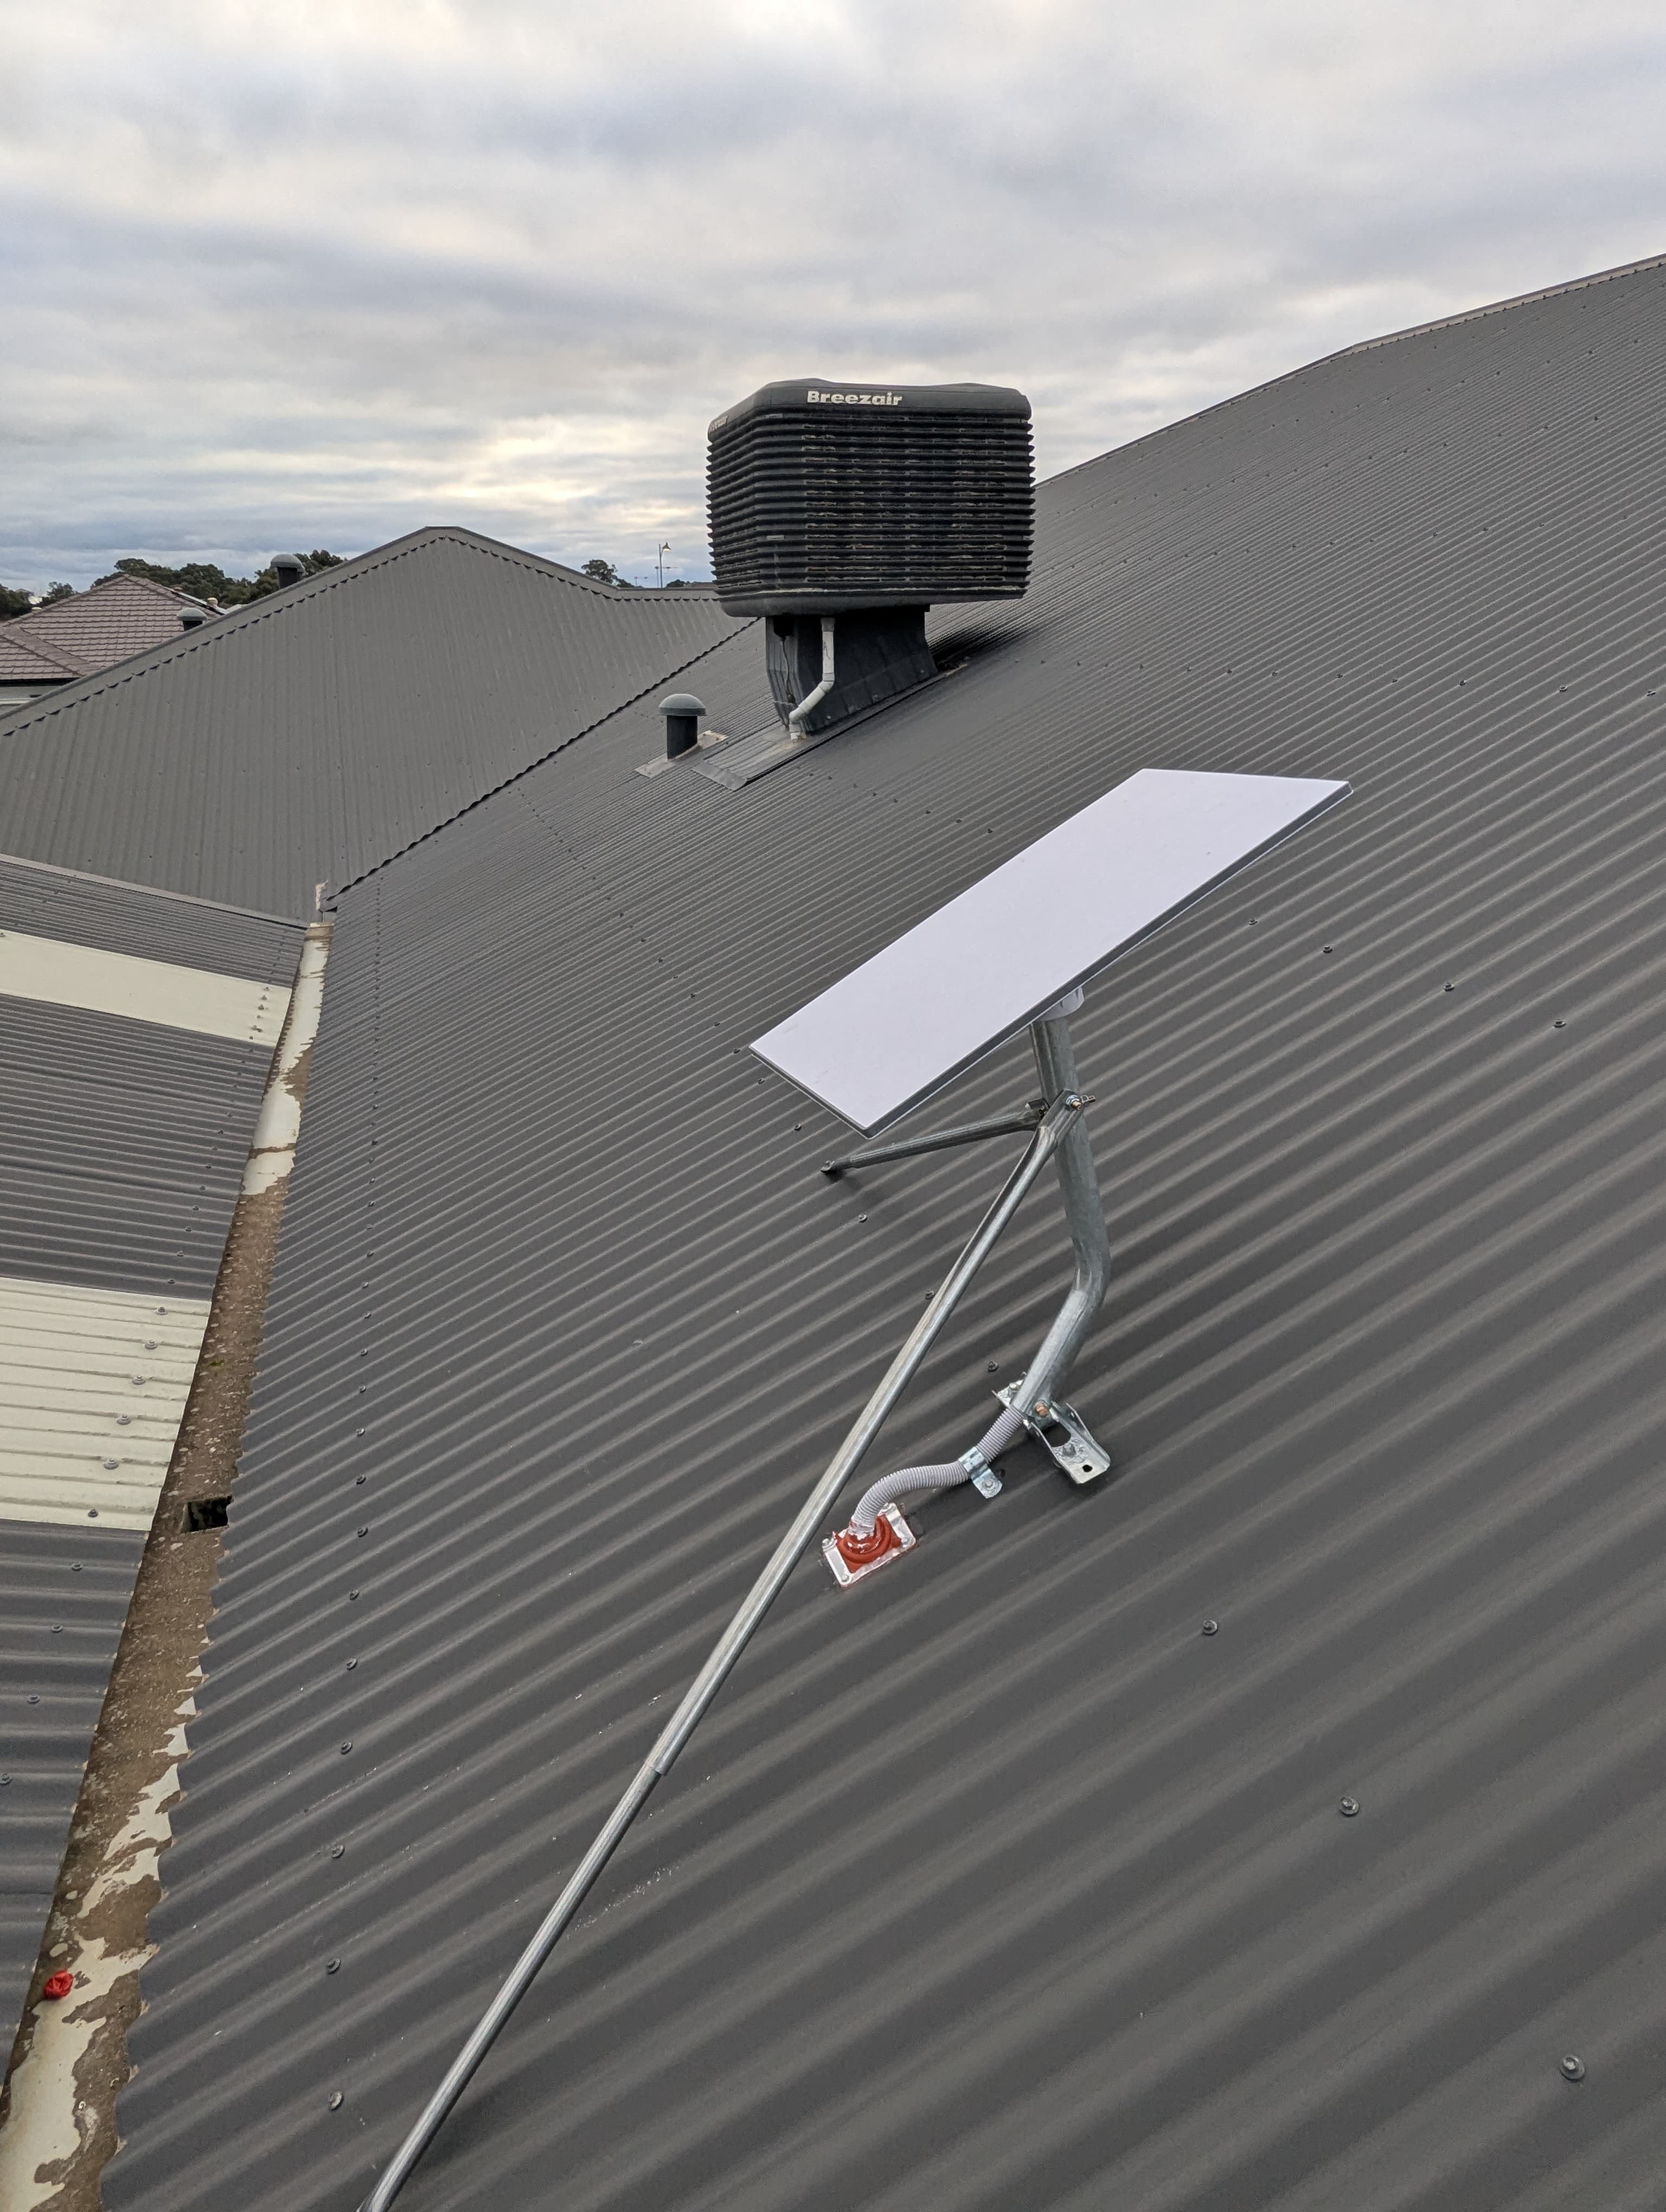
Mounting Options: One Size Does Not Fit All
For a permanent Perth installation, the Starlink kickstand is not the right long-term answer. Your best option depends on the roof, sky visibility, cable path and wind exposure.
- Roof mount
- Wall mount
- Fascia mount
- Pole mount or custom mast
Cable Routing and Weatherproofing: The Mark of a Pro
One of the biggest giveaways of a rushed job is messy cable work. Cables draped across the roof, flapping down a wall or pinched through a window are not a professional finish.
A professional Starlink roof installation means tidy, protected cable runs, concealment inside the pole, conduit or wall cavity where possible, no sharp bends or pinch points, and properly sealed roof or wall penetrations.
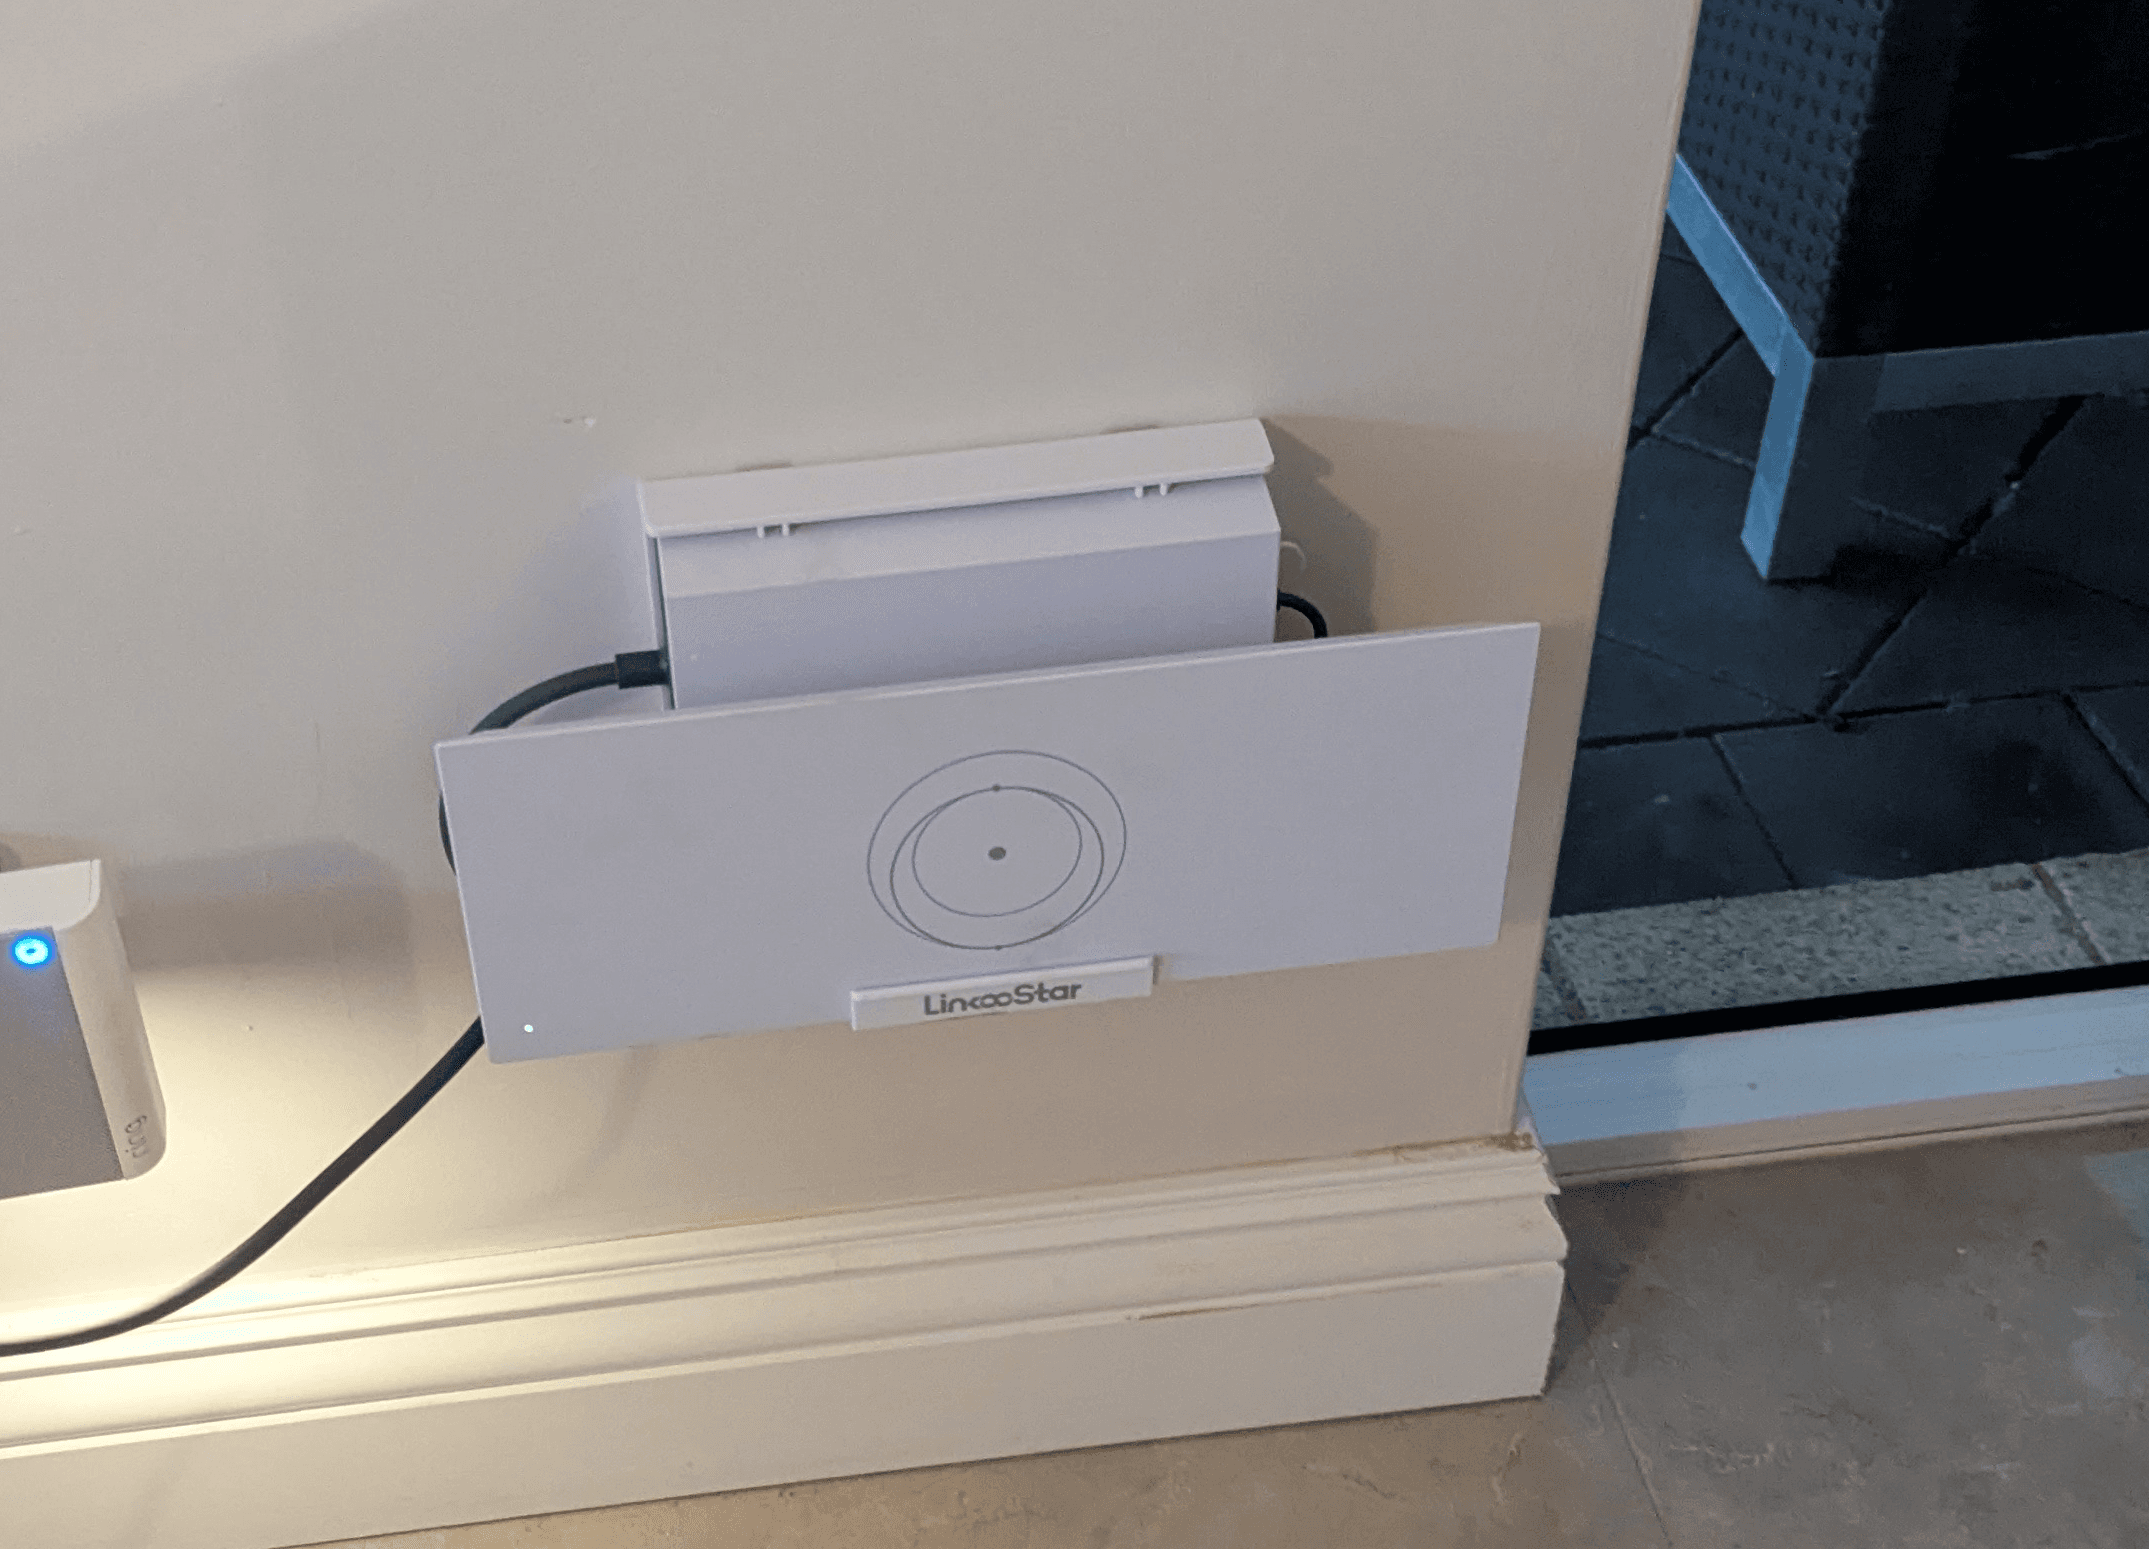
Router Location and a Neat Internal Finish
A smart install does not stop at the roof. The cable should enter the home neatly, and the router should go somewhere practical, not just wherever the cable happens to land.
A neat internal wall plate makes a big difference, especially in living areas or home offices.

System Setup, Dish Alignment and Testing
Starlink hardware is approachable, but setup still matters. The job is not done until the dish is positioned and clear of obstructions, the system is set up in the Starlink app, the router is connected, Wi-Fi is tested and you know how to use the system.
A professional Starlink installation Perth service should include setup and handover as standard, so you are not left guessing.
Extra Wi-Fi or Mesh Setup
Starlink brings internet to the property, but not every house is built for perfect Wi-Fi. If you have a large home, double brick, a shed, a granny flat or a home workspace, you may need mesh Wi-Fi or hardwired access points.
Many Wi-Fi problems are coverage problems, not Starlink problems. A proper install considers both the internet connection and the Wi-Fi experience inside the home.
DIY vs Professional Installation
DIY can work for temporary setups or if you are handy, but permanent roof installs are a different job. Risks include poor dish location, unsafe ladder work, bad cable entry, cracked tiles and ugly finishes.
Professional installation gets the mount, cable, weatherproofing and Wi-Fi right the first time, which can save money down the track.
What Is Included in a Blake Smart Solutions Installation?
Our standard Starlink installation is designed to be clean, practical and reliable. Every property is different, so the approach is tailored to the home rather than treated as a generic install.
- Suitable Starlink mount and pole adapter where required
- Concealed cable inside the pole where practical
- External conduit where needed
- Watertight roof or wall entry with Dektite seal where suitable
- Neat internal wall plate where possible
- Starlink system setup and dish alignment
- Obstruction check
- Router and Wi-Fi function test
- Basic handover so you know how to use your system
Real Perth Installation Example: Oakford Rural
A recent Oakford install is a good example of why property conditions matter. The customer had NBN Fixed Wireless, but it was not reliable enough for streaming, working from home and monitoring cameras.
We installed the Starlink dish on a pole for clear-sky access, concealed the cable properly and delivered a tidy, robust setup. The result was steadier internet, faster streaming and more peace of mind.
Price Guidance and Final Thoughts
A simple install may be straightforward, but complex jobs cost more because of access, safety, mounting, cable routing, weatherproofing and Wi-Fi requirements.
If you are wondering how much to install Starlink in Australia, the honest answer is that the right price depends on the property. For Perth homes, a tidy, watertight and well-positioned professional installation is usually better value than fixing mistakes later.
Ready to get connected? Send photos or request a quote, and we can give you honest guidance for your property.